What Are White Balance And Colour Temperature Camera Settings?White Balance in photography allows changes to the colour cast in the photo making it warmer or cooler depending on the lighting conditions.
This article is part of a series of articles. Please use the links below to navigate between the articles.
- Introduction to Photography Course - Definition & Types of Photography
- How Cameras Work and Terminology Explained for Beginners
- What is the Exposure Triangle and How Does It Affects Exposure?
- Understanding Camera Shutter Speed for Beginners
- Aperture and Depth of Field in Photography Explained
- What is Digital Photography ISO and Grain?
- How to Understand Camera Lenses and Focal Length
- Essential Photography Composition Rules To Improve Your Photos
- Camera Metering Modes Demystified - Which One To Use
- Camera Shooting and Exposure Modes Explained
- Complete Guide to Flash Photography for Beginners
- When and How To Use A Camera Tripod In Photography
- What Are White Balance And Colour Temperature Camera Settings?
- How to Use Camera Histograms in Photography for Perfect Exposure
- Master These 10 Camera Settings For Your Best Photographs
- Why You Should Be Shooting in RAW - Reasons and Benefits Explained
- Essential Photo Editing Techniques to Enhance Photographs
- Complete Guide to Macro Photography for Beginners
- Beginners Landscape Photography Guide for Stunning Photos
The White Balance setting on cameras and editing software allows changes to the colour balance in your photos, making them warmer or cooler depending on the light conditions you're shooting in. White balance is also used to change the atmosphere in your photo.
Any discussion of the white balance in photography must begin with colour temperature, an attribute of light that's a way of quantifying light's overall basic colour.
What is Colour Temperature?
The term "colour temperature" is borrowed from physics, where it relates to the spectrum of light that's radiated from a theoretical object called a black body. As you heat this object, it changes the colour that it emits. Terms like red hot and white hot are manifestations of this principle. As an example, if you heat a piece of metal, first it becomes dark red. As it becomes hotter, it turns yellow. Finally, as it becomes hotter still, it turns more bluish-white, or what some might consider white.
In photography, however, the terminology we use for colour temperature (warm or cool for example) is just the opposite of its meaning in physics. Photographers consider blue to be cool and red to be warm.
Light sources such as natural daylight and tungsten bulbs closely mimic the light created by black bodies. Other light sources such as fluorescent and most commercial lighting differ greatly. Photographers use the term colour temperature to refer to correlated colour temperature with a similarly coloured black body.
The following table is a general guide to the correlated colour temperature of some common light sources.
| Colour Temperature | Light Source |
|---|---|
| 1000-2000 K | Candlelight |
| 2500-3500 K | Tungsten Bulb (household variety) |
| 3000-4000 K | Sunrise/Sunset (clear sky) |
| 4000-5000 K | Fluorescent Lamps |
| 5000-5500 K | Electronic Flash |
| 5000-6500 K | Daylight with Clear Sky (sun overhead) |
| 6500-8000 K | Moderately Overcast Sky |
| 9000-10000 K | Shade or Heavily Overcast Sky |
Fortunately, most digital cameras contain a variety of preset auto white balance settings, so you do not have to worry about colour temperature.
What is White Balance in Photography?
White balance is a process of adjusting the colour temperature/cast so that objects which appear white in person are rendered white in your photo. For example, take a sheet of white paper and place it under an indoor incandescent light - it takes on an orange tint - warm. Take that same paper and place it under fluorescent lights it appears much whiter, or even slightly blue-cold. Having the incorrect white balance is responsible for making photos appear very orange when indoors, or photos taken at dawn or dusk appear blue.
Most of the time modern cameras do a pretty good job of selecting the correct white balance profile when auto white balance is enabled. this means we need not worry about it too much, however, there are times when the camera gets confused.
The most common colour profiles and corresponding temperatures and uses are shown in the illustration below.

Adjusting White Balance Settings to Improve Photos
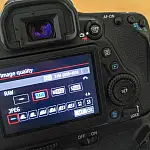
Most cameras have a setting in the menu, or even a quick access button to select the white balance setting. This is typically a light bulb symbol or the letters WB. Inside the menu, you will see a list of settings to select. Some cameras have a custom white balance setting where you can input the colour temperature in Kelvins. The table below shows some of the most common white balance settings on cameras and when to use them.

Common White Balance Settings for Canon and Nikon
Auto (AWB) - A simple fail-safe for snapshots, but can vary from shot to shot depending on how the camera meters the scene.
Incandescent - Used for domestic indoor lighting and will colour match more effectively, eliminating the orange colour from indoor photos.
Fluorescent - for use when photographing under fluorescent lighting, however, there are many types and this setting often has many options.
Direct Sunlight - Gives neutral colours under midday sun. Often used as a reference for "normal"
Cloud - For shooting outdoors in cloudy conditions, overcast with grey skies and a dull light cast
Adjusting White Balance in Adobe Lightroom and Photoshop
The easiest method is to select the correct colour profile on the camera; however, it may be required to do so afterwards in post-processing.
Most image editing packages have an auto white balance feature or a feature which allows selection from a list of presets, similar to the camera. There is also often a manual mode, allowing you to manually specify what "white" is and what "black" is. From this, it can generate a colour profile curve which can then be fine-tuned. It should be noted that this option is for advanced users as incorrect settings here will have disastrous results.
White balance adjustments are much easier when you shoot in RAW as the raw files contain the raw data - the camera has not tried to adjust the colour balance, and there is much more information to work with than a JPEG which has a lot of detail stripped out. You can still change the white balance when shooting in JPEG but only by slight amounts. Large amounts will cause the quality to degrade.

Most, if not all post-processing software such as Adobe Photoshop or Lightroom come with an auto white balance option.
In Lightroom, you can adjust the white balance in the selected image by selecting an option from the White Balance dropdown list. You can use this to fix the image or you can use it as a starting point and then fine-tune the results.
You can also manually adjust the Temp slider to add warmth or remove it from the image. Drag the slider to the left to add a blue tint to the image (to cool it down), or to the right to add a yellow tint to it to warm the image.
Use the Tint slider to balance out any excess magenta or green in the image. Drag towards the right to add magenta to the image cancelling out any green tint and drag to the left to add a green tint cancelling out any unwanted magenta.


