How to Clean and Speed Up a Slow Computer - Make Windows Fast AgainOver time computers get bogged down with programs and updates and performance deteriorates. Here's how to speed up slow computer again.
There are many reasons why a computer or laptop gets slow over time. Windows will download and install updates regularly, users install programs, many of which are set to launch on startup by default, settings get changed, the system registry gets corrupt, and hard drives run out of space and are badly organised just to name a few. In this article, I will look at the various methods to speed up slow computers starting from some basic housekeeping tips and routine maintenance, covering system restore to defaults and a few hardware upgrades you can do to boost the performance of old laptops.
Uninstall Programs You Don't Use to Speed up Slow Computer
Over time we all install programs which were either useful at the time or that you tried and didn't like. Inevitably there are installed programs that you do not use which are just taking up hard drive space and wasting system resources.
To uninstall programs that you do not use, click on the start menu and type "add or remove programs" and select the system settings applet.

The add or remove programs applet shows all the currently installed programs. Scan down the list and look at each of the programs and work out if you need to keep it or not. Some of the entries will be for system programs you need to keep, such as "Microsoft .Net Core Runtime" and others could be drivers, such as "Asmedia USB Host Controller Driver". You should not uninstall these. In general, only uninstall programs that you know you don't use any more.
Disable Programs running at Startup
You should take a look at the programs configured to run at startup, particularly if your computer is slow to load. This is a list of all the programs which automatically run, and a lot of programs decide to run automatically when they don't need to, or they install automatic update software which runs on startup.
To see the list of what is running on startup, simply right-click the start menu, select "Task Manager" and then on the Startup tab. If you cannot see any tabs along the top, click on "More Details" at the bottom.

You should look at each of the entries in the list and determine if you need that program to run on Windows startup. For each item that you do not want to load on startup, simply right-click the item and select disable. You can always re-enable it later if you change your mind. Disabling startup entries will not prevent you from running the program, it just won't load on startup. You can still launch the program from the start menu manually.
Disable Windows Features Not Needed
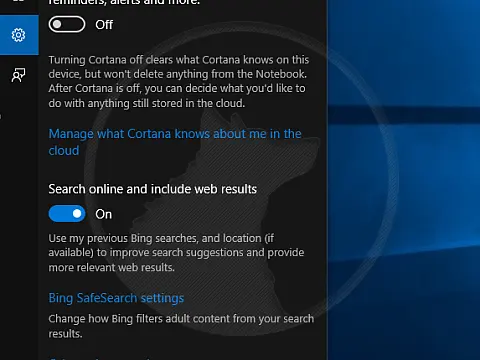
Windows comes bundled with a whole host of applications that many do not need or want to be installed. Some are bloatware (Skype, Office 365 trial, OneDrive etc) and can be uninstalled from the add and remove programs step above, and others are listed under separate screens. Some features such as Cortana cannot be uninstalled, but you can disable it if you don't use it. Things like web search can also be disabled to prevent the start menu from doing web searches as well as local files, and various advert settings, OneDrive syncing can also be disabled to improve performance, speed up a slow computer and improve privacy!
I bundled those tips into a separate article, so head there and make any changes you feel you need to then come back to this page and continue reading for more tips to speed up a slow computer.
Anti-Virus / Anti-Malware
These days running Anti-Virus / Anti-Malware tools is an essential requirement, however, I've seen clients' computers running multiple antivirus software at the same time. This is not needed and will significantly slow down your computer.
Most new computers come bundled with a free trial of antivirus software which then usually expires so the user installs a free antivirus package and leaves the trial installed. Now every file being accessed is scanned three times. Why three? Well, Windows 10 has its own Windows Defender suite which includes Anti-Virus and Anti-Malware built-in.
I'm not going to get into which software is best, but you only need one anti-virus software installed. Personally, I just run Windows Defender for all my needs, you may choose to run other software, but you only need one, so pick one and uninstall the others.
Run Windows Updates
Windows generally does a good job of keeping itself updated, however, there are frequently driver updates that are optional and are not automatically installed. Driver updates can often include performance improvements and security patches so it's always a good idea to keep them updated.
To install optional Windows Updates, head to the start menu and type "check for updates" and launch the system settings applet.
From here you can see a list of optional updates if there are any, and you can choose to install them.
Run Disk Cleanup to Speed Up Slow Computer
Now we've been through the installed programs and removed the ones we don't need we can run a hard drive cleanup tool to remove any unneeded files left over. The tool can also clean up temporary files, internet history and cache, empty the recycle bin and clean up system files which may have been left over from Windows Updates and Windows Upgrades.

To run disk cleanup, head to the start menu and type "disk clean-up". The tool will scan your hard drive and produce a list of things that can be cleaned and the amount of space it'll free up. Select the items to clean and click OK to begin the process.
Defrag Hard Drives
Now that we have removed any unused programs and cleaned up the hard drive we can optimise it to make the drive as fast as possible. The process is called fragmentation and involves a very low-level program moving chunks of files around the hard drive to put them in order. I won't get into the details but essentially a file is written to a hard drive in chunks, and these chunks are arranged in a random order if the hard drive has been used for a while. To read the file it has to jump around all over the place picking up each chunk, and is slow to do so. The defragmentation process puts all the chunks into order and puts them together so the drive has to do a lot less work to read a file.
This tip is for people running old-style Hard Disk Drives. If you are running an SSD or NVMe drive you DO NOT need to defrag it. These new drives work in a totally different manner and have more intelligent systems that do not need defragging. Defragging an SSD can actually physically damage it. If you have an SSD or NVMe drive, check out the SSD tweak tips below instead.
To defrag a hard drive, head to the start menu and type "defrag and optimise drives". In the panel that appears, select the C: drive and check the current status. If it says that optimisation is needed, then click the optimise button. If the media type says Solid state drive, do not run the defrag tool any further, simply close it and check the article below.
Adjust Power Options
Most laptops have different power modes which range from Best Performance to Battery Savings. If your laptop is plugged in and running on power saver mode then you will not get very good performance. You can opt to select a balanced or high-performance mode in this case. When you unplug the power cable, Windows should automatically switch to power-saving mode, and back to high performance when the power is plugged back in.
Power management settings can be changed by clicking on the battery icon in the system tray. There is a slider to adjust the power saving/performance balance. Simply drag it to the option you need.
Reboot and Reboot Regularly
Windows does need to be rebooted regularly to maintain good performance. This is because during the day we use a lot of programs and files, system tasks run, updates do updates and so on. This all leaves files in memory, cached ready for the next use. Over time these get cleared automatically, but some programs aren't written to close files when they exit so they cannot be automatically cleared. A simple reboot once a day, or even better is to shut down and power off the computer when you are done using it. Entering a suspend or hibernation state will not clear anything. You need to shut down and power off, or click reboot.
Reinstall Windows / System Restore
If you have tried all these tips and still do not have good performance there are two tips left for you to try. The first is a system restore which will take your laptop or computer back to factory settings. This will remove all files, programs, drivers, updates, settings and everything else that might be making your computer slow. You should be sure to back up any files you need to a removable drive to prevent them from being deleted. System Restore to factory settings will result in a faster computer especially if you have been using it for several years.
Hardware Upgrades - Upgrade to SSD and More Memory
The last item on the list can speed up slow computers if your computer or laptop supports upgrades. You'd need to check your computer model number online to see if it can be upgraded and by how much. If you have a laptop you can quickly check the underside. If you see screws then chances are good that there is something you can do. If there are no screws then it could be a sealed unit.
For laptops, there are usually only two things you can upgrade, both of which can result in a faster computer. The first is the hard drive. If you have an old-style Hard Disk Drive, switching to an SSD can yield a lot of performance improvements, and if you already have an SSD and are running out of space you can install a new SSD with a higher capacity.
The other item you may be able to upgrade is the RAM or memory. Most laptops have modest amounts of RAM installed and if it's an older laptop, say 3-4 years, then chances are that RAM isn't sufficient for the latest Windows 10 or Windows 11. Both Windows 10 and Windows 11 state a minimum requirement of 4GB RAM, but that's just the minimum. You should be looking at 8GB or even 16GB to run Windows smoothly.
To check to see if your laptop can have the HDD/SSD and RAM upgraded you should contact your local computer repair shop or consult YouTube and see if any videos are showing the process to upgrade for your specific model number.