Essential Guide to Working with Files in LinuxSome of the command line tools used to perform basic operations on files in Linux, as well as reading and writing on the command line.
This article is part of a series of articles. Please use the links below to navigate between the articles.
- How to Download and Installing Linux Step by Step For Beginners
- Essential Guide to Working with Files in Linux
- Understanding Linux File Permissions and Permission Calculator
- How to Archive, Compress and Extract Files in Linux
- Linux Piping and Redirection Explained
- Hardlinks and Softlinks in Linux Explained With Examples
- How to Create and Use Bash Scripts in Linux
- Data Recovery in Linux - How To Recover Your Data after Drive Failures
- Apache Web Server Administration Cheat Sheet for Linux
- Essential MariaDB and MySql Administration Tips on Linux
- How to Switching from Windows to Linux - A Complete Guide
Before starting this tutorial, you should be comfortable opening up a command shell or switching to a console screen. My terminal emulator of choice is Terminator due to its good highlighting and ability to create split windows for multiple tasks.
Navigating the File System
The first command we are going to look at is the listing command LS. This command allows us to see the directory structure and the files, allowing us to traverse the file system.
Basic usage is to just type LS at the prompt. This will simply show all the files and directories in the current directory, as long as they are not hidden.
tim@ubuntu:~$ ls
Desktop  Documents  Pictures  Videos  Downloads  Music  Public  Templates
The default listing is to show just file and directory names, which may not be ideal but it does save space on the screen.
There are several switches, or flags, which you can set to change the layout and formatting of the output.
ls -l- Shows a long listing with meta datals -li- Show a long listing with the inode numberls -lh- Shows a long listing in human-readable formatls -a- Shows everything including hidden files beginning with a .ls -ltr- Shows a long listing with files sorted by timestamp reverse order
These are examples of the most useful flags, a full list of flags can be seen using the command:
ls --help | less If you find yourself often typing in the same flags over and over again (I prefer to use ls -lh instead of just ls) you can create an alias in your bashrc script. We'll cover this in more detail later on but essentially edit the ~/.bashrc file, locate the alias section and add one for alias ls="ls -lh". Save and relog.
When using the ls -l format, you may notice a horrid block of seemingly random nonsense at the start of each line. This is called the file metadata and it has a specific format.
<strong>drwxr-xr-x.</strong> 110 root root 8192 May 14 12:11 /etc The first character represents the type of file. This isn't anything to do with the file format (.jpg, .txt etc) it is the system file type. These are described in the table below.
| Letter Code | Description |
|---|---|
| - | Normal files (mydocument.txt) |
| d | Directory (Downloads/) |
| l | Symbolic links (DL -> Downloads) |
| b | Block devices (/dev/sda) |
| c | Character devices (/dev/tty0) |
| p | Named pipe |
| s | Socket |
The next 9 sets of seemingly random characters are the file permissions. We'll look at Linux permissions in the next tutorial.
Next is the number of hard links to this entry in the metadata. This is equivalent to the number of subdirectories minus two. Minus two because there are two default "files" created, '.' which represents the current directory and '..' which represents the parent directory. These are system generated and cannot be deleted.
The next two fields are the owner username and the owning group. Again, we'll cover these in greater detail when we look at permissions in Linux.
Next is the file size, by default in bytes but by specifying -h in the command this is converted to a human-readable format with units, so 4096 becomes 4.0k.
Next, we have the last modified timestamp, then the actual name of the file.
Finally, we can provide another parameter to the ls command, to view the contents of other folders.
ls -h /dev
Now that we can see what files and directories we can have a look at working with the files. There are simple commands for copying, moving, renaming and deleting files.
| Command | Description |
|---|---|
| cp | File Copy |
| mv | Move or rename files |
| rm | Delete files |
Each of these commands has a few common flags which are useful to know about.
| Flag | Action |
|---|---|
| -i | Interactive mode (prompts for confirmations) |
| -r | Recursive (processes all files and directories below the one specified) |
| -v | Verbose (more visual indication as to what's going on) |
| * | The Wildcard (matches anything) |
Change directory
If you stayed at home all the time, life would be pretty boring. You can use the CD command to change the current working directory to another on the file system. You can specify a directory within the current directory, an absolute path or a relative path.
cd Documents - change to the Documents directory of the current folder
cd /usr/bin - change to an absolute directory
cd .. - change to the parent direectory
cd ../Documents - change to the documents directory of the parent directory
cd ../../../Documents - change to the documents directory of the great grandparent directory
If all this gets too much for you, you can use the ~ (tilde) to return home.
cd ~ Create Directory
You may be wondering where all these directories come from and if you can create your own. Well, you can create your own using the mkdir command.
mkdir myDirectory This will create a new directory in the current directory called myDirectory.
You can also create multiple directories or directories in other paths by specifying an absolute or relative path. If there are multiple directories which do not exist, you need to specify the -p flag to create parent paths as well.
mkdir some/test/path
mkdir: cannot create directory 'some/test/path': no such file or directory
mkdir -p some/test/path
We'll look at permissions in depth in a later tutorial, but you can specify the permissions when creating a directory.
mkdir -m 700 testfolder Will create the testfolder with the permissions set to 700.
Copy/Move/Delete Files in Linux
There are several combinations of file copy operations. The basic syntax is
cp source destination
To make things easier you can use the asterisk character as a wild card. These allow multiple files to be copied. Here are some examples.
cp * /tmp/ - copy everything
cp *temp /tmp/ - copy everything ending with temp
cp temp* /tmp/ - copy everything starting with temp
cp *.php /usr/web/public_html - copy all php files to the public_html folder
Recursive File Copy
By default, the cp command does not recurse into folders. For that, you need to add the -r flag. This will copy matching files in the source directory and subdirectories, creating a new structure on the destination.
(add examples of recursive directory copy)
Remove or Delete a File
It's always good to remove unwanted files, and this is easy with the remove (rm) command.
rm file
Wildcards can also be used as per the copy command.
Remove Directory
Folders can be removed as long as they are empty, but it isn't really very nice to have to go into a directory and manually delete all the files first, especially if the directory contains subdirectories which also must be cleansed of files.
rm: cannot remove 'someDirectory': Is a directory You can use the flags for recursive deletion, with a forced removal. This will recursively delete all files and directories, and force the removal.
rm -rf someDirectory
Be careful using this command, especially if you have root privileges, as you can delete the entire system of directories which may result in an unstable or broken environment
Update Last Modified Timestamp
Linux maintains a timestamp on a file which is the last time it was modified. This is useful for archiving, where you can specify to archive all files modified since a specified date. Should you wish to backup a file whose date is previous to this you can either open the file and save it or use the touch command.
touch myFile
This will update the timestamp to the time now. If the file does not exist it will be created as a zero-length file.
Reading and Writing Files in Linux
These are easy commands for reading short files and displaying the contents on the command screen.
Reading Files To Screen - Cat
Cat is a command to show the contents on a file on the screen.
cat /etc/hosts
127.0.0.1localhost
127.0.1.1Megatron
You can also use this command to show the output of two or more files in the same command.
cat /etc/hosts /etc/hostname
127.0.0.1localhost
127.0.1.1Megatron

Megatron
There is a nifty command which will show you the word count of a file, and also the line count.
wc /etc/services- Word Count for filewc -l /etc/services- Line Count for file
These commands work for very small files, with no more than a few lines. For larger files, we can use the head and tail commands. These commands show the first n lines and last n lines respectively.
tail /var/log/apache/access.log
This command will show the last 10 lines from the Apache access log. Both commands have the same parameters, the most often used is the -n option to change the number of lines shown.
tail -n 20 /var/log/apache/access.log This command shows the last 20 lines.
For viewing larger files on a friendly screen which allows you to page up and page down, the less commands are most often used. Less allows paging through the file using the page-down and page-up keys. It also allows for searching.
less /var/log/apache/access.log
hit / to search for text
:? to search backwards
:n gives next match
:q to quit
Finding Files in Liux
In Linux, there are also many commands for searching for files on a hard drive. The most commonly used is the find command. This command will recursively scan a directory for matching files.
To find all the PDF documents in /usr/share/doc use this command:
find /usr/share/doc -name '*.pdf' You can also use this command to perform actions on the file, for example, find all the PDF documents and copy them to another directory.
find /usr/share/doc -name '*.pdf' -exec cp {} . ; This will find all the PDF files in /usr/share/doc and execute the copy command. the {} represent the current matching file and the dot is the current directory. The line is terminated with an escaped semicolon. If you don't specify the folder in the find command it will start from the current working directory.
You can also delete files using the find command
find -name '*.pdf' -delete You can even search for large files taking up space on your hard drive.
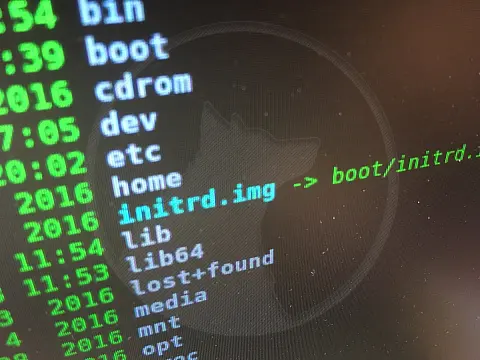
find /boot -size +10000k -type f -exec du -h {} ; This will show all the files above 20 MB of type file, outputted through to the du command
38M/boot/initrd.img-4.4.0-21-generic Comparing Files with Diff in Linux
Sometimes you may need to compare two files to see if there are any differences or if they are the same. This can be done using the diff command. For this example, I'll create two test files and show cat output of each.
diff file1 file2
6c6,7
< 1
---
> 2
> it is different
This indicates that line 6 in both files has changed and the second file has an additional 7th line. The left angle bracket indicates a change in the first file (left) and the right angle bracket a change in the second file (right). So, line 6 changed from 1 to 2, and the second file adds "it is different".
The code 6c6 gives the left line number, an action code and the right line number. The action codes are as follows:
- a - add
- d - delete
- c - change
Compare Binary Files
Comparison of binary files cannot be done visually like this due to binary nature, the output is not meaningful and very difficult to understand. Instead, we can compare the md5 checksum hash of a file. This is useful when downloading software from the internet, to compare the download files checksum with the published value to identify if the download has been completed successfully or if it has been modified from the original.
md5sum plexmediaserver_0.9.15.3.1674-f46e7e6_amd64.deb
9a6f3486be986bc7f8b6f4c3de2c20d0  plexmediaserver_0.9.15.3.1674-f46e7e6_amd64.deb
If the two checksums are the same then the file is correct, if there is a difference then the file has been altered in some way, either an incomplete download, corrupted or modified.
Finding Text Within Files in Linux with Grep
Grep is an essential Linux/Unix tool used for finding text within files. Grep is very simple to use, much misunderstood and very powerful. It is an essential command to master when using Unix and Linux. Grep is the Linux equivalent of Windows Find in Files. Grep can use regular expressions to search files or output for text, it can also use plain text searches.
To search for files containing a particular string, it is as easy as typing in
grep "findme"
This will list out the files and the text surrounding the match. You can add the -r flag to search recursively.
grep -r "findme"
You can also search the output of other commands, for example, a list of the currently installed packages. To see a list of the currently installed packages is a simple command, however, the output is very large and can be difficult to locate all the installed Apache packages.
sudo apt --installed list
To make things easier, we can pipe this output to the grep command which will then search and show only the packages with Apache in the name.
sudo apt --installed list | grep apache
apache2/now 2.4.7-1ubuntu4.13 amd64 [installed,upgradable to: 2.4.7-1ubuntu4.15]
apache2-bin/now 2.4.7-1ubuntu4.13 amd64 [installed,upgradable to: 2.4.7-1ubuntu4.15]
apache2-data/now 2.4.7-1ubuntu4.13 all [installed,upgradable to: 2.4.7-1ubuntu4.15]
apache2-mpm-prefork/now 2.4.7-1ubuntu4.13 amd64 [installed,upgradable to: 2.4.7-1ubuntu4.15]
apache2-utils/now 2.4.7-1ubuntu4.13 amd64 [installed,upgradable to: 2.4.7-1ubuntu4.15]
libapache2-mod-php5/trusty-updates,trusty-security,now 5.5.9+dfsg-1ubuntu4.21 amd64 [installed]
libapache2-mod-svn/trusty-updates,trusty-security,now 1.8.8-1ubuntu3.2 amd64 [installed]
libapache2-svn/trusty-updates,trusty-security,now 1.8.8-1ubuntu3.2 all [installed]
Using Grep with Regular Expressions
Using regular expressions with grep allows us to search for text beginning or ending with a string. These commands can work on files or the piped output of a command. In these examples, I'm just working on a file for ease of demonstration.
You have to use the -E flag for enhanced search, which allows the use of regex. This command will show files starting with fig.
grep -E ^fig /usr/share/dict/words
This will show files ending with ion
grep -E ion$ /usr/share/dict/words
This will show the lines where the word toon is a word, that is preceded and followed by a word boundary (spaces, punctuations, carriage returns etc.)
grep -E '*toon*' /usr/share/dict/words
This shows matches which start with po, contain any two characters, and ends in ute.
grep -E '^po..ute$' /usr/share/dict/words
And this shows all matches which contain any 5 of the specified letters in the brackets
grep -E '[aeiou]{5}' /usr/share/dict/words